Complete Guide: Skateboard Setup Tutorial for Beginners
Starting with skateboarding means knowing how to put together a skateboard. This guide is for beginners and curious people. It covers all the important parts and how to use them.
Skateboarding is not just a sport; it’s a way to express yourself. To make your skateboard just right, you need to pick the right parts. Then, you have to put them together carefully.
Key Takeaways
- Learn the fundamental components of a skateboard
- Understand proper assembly techniques
- Discover safety considerations for setup
- Master the art of customizing your ride
- Gain confidence in skateboard maintenance
Understanding Skateboard Components
Building the perfect skateboard begins with knowing its key parts. It’s important to understand each part’s role and how they work together. Whether you’re new or want to improve your setup, learning about these parts is essential.
Skateboards are made of several important parts that help you ride smoothly. Let’s look at the main components that turn materials into a top-notch skateboard.
Deck Construction and Materials
The deck is the base of your skateboard. It’s usually made from maple wood. This wood is pressed together to make it strong and flexible. A good deck can cost between $30 and $120, with high-end decks performing better.
- Maple wood gives durability and flexibility
- Multiple layers make it strong
- The deck’s width affects stability and control
Trucks and Their Function
Trucks connect your wheels to the deck. They’re key for steering and stability. Most skateboards use kingpin trucks, which cost between $20 and $80. The truck’s angle and how it’s mounted greatly affect your ride.
- The baseplate angle changes how easy it is to turn
- Correct truck alignment stops wheels from biting
- Adjusting bushings can change the feel
Wheels and Bearings Basics
Wheels and bearings affect your skateboard’s speed and smoothness. The hardness and size of the wheels matter, as do the bearings for smooth rotation. Wheels cost between $15 and $60, and bearings from $10 to $70.
- Softer wheels give better grip
- Harder wheels roll faster
- Bearing ABEC ratings show precision
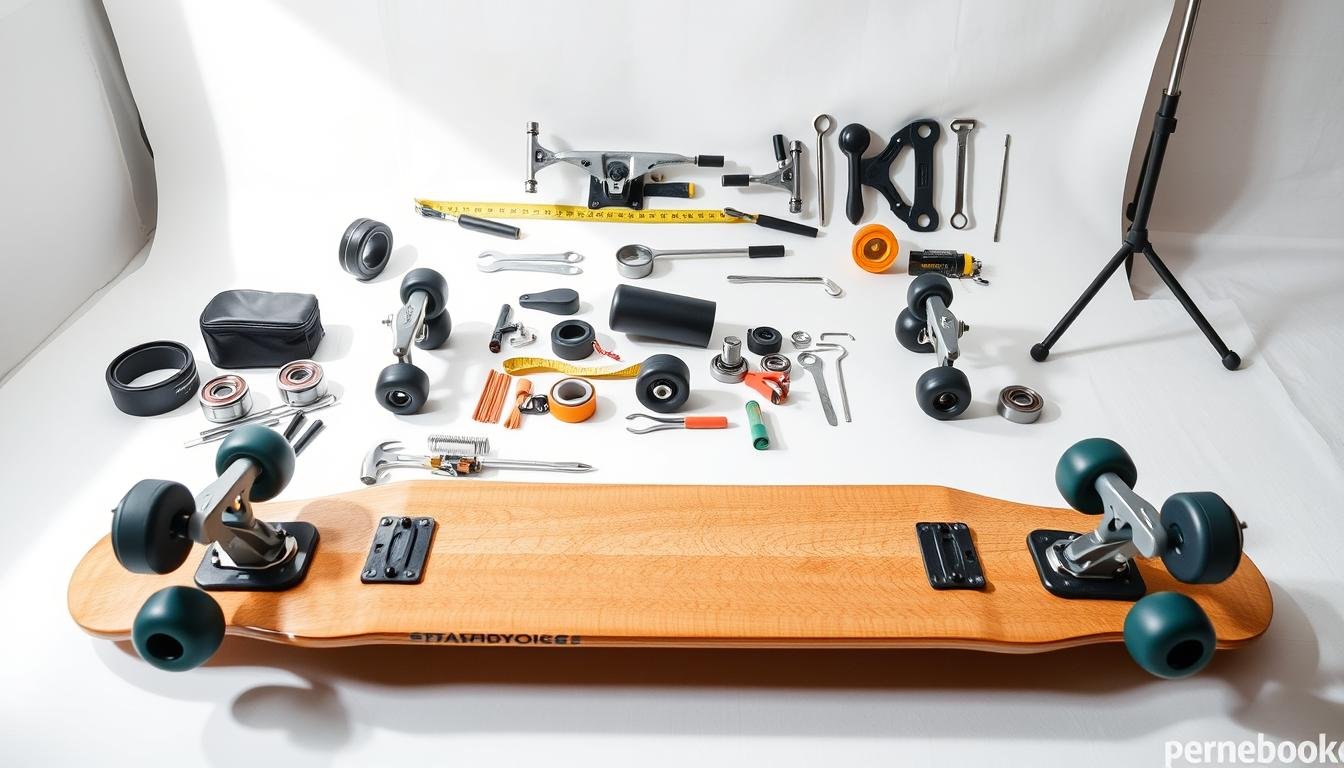
Essential Tools for Skateboard Assembly
Getting ready for a DIY skateboard setup means you need the right tools. Beginners should get a few key items for a smooth assembly. This will make the process successful.

For beginners, a good toolkit is essential. It should have several important tools:
- Skate Tool: The most important tool for assembly
- Phillips Head Screwdriver
- Razor Blade or Sharp Utility Knife
- Ruler or Measuring Tape
- Soft Cloth or Cleaning Rag
Each tool has a specific role in setting up a skateboard. The skate tool is key. It does many things, like:
- Adjusting truck nuts
- Tightening wheel bearings
- Removing and installing hardware
| Tool | Primary Function | Importance Level |
|---|---|---|
| Skate Tool | Multi-purpose adjustment | High |
| Screwdriver | Hardware installation | Medium |
| Utility Knife | Grip tape cutting | Medium |
| Ruler | Precise measurements | Low |
Quality tools make setting up your skateboard easier and more fun. Beginners should focus on a good skate tool. It will help you through many skateboard builds and maintenance tasks.
Choosing the Right Deck Size and Shape
Finding the perfect skateboard deck is key to a great ride. Knowing how deck features affect your skating is the first step in the essential skateboard assembly tutorial.
Your deck and truck setup shape your skating style and fun. Each deck style suits different riding preferences.
Street vs. Cruise Deck Styles
Skateboard decks mainly fall into two styles:
- Street Decks: Narrow and quick, great for tricks
- Cruise Decks: Wide and steady, best for smooth rides
Width and Length Considerations
Deck size matters for comfy skating:
| Rider Height | Recommended Deck Width | Skating Style |
|---|---|---|
| Under 5’4″ | 7.5″ – 8.0″ | Technical Street Skating |
| 5’4″ – 6’0″ | 8.0″ – 8.5″ | All-Around Skating |
| Over 6’0″ | 8.5″ – 9.0″ | Transition and Cruising |
Concave Types and Their Benefits
Various concave shapes improve your skate:
- Mellow Concave: Soft curve for easy cruising
- Medium Concave: Balanced for all-around skating
- Steep Concave: Deep curve for tight tricks
Knowing these deck features helps you choose wisely for your skateboard and truck setup.
Skateboard Setup Tutorial: Step-by-Step Guide

Building the perfect skateboard needs focus on every detail. About 70% of skateboarders like to customize their boards. This guide will help you set up your skateboard step by step.
Start by getting all the parts and tools you need. Skateboards can cost between $100 to $200. So, it’s important to assemble it right.
- Prepare Your Workspace
- Clear a flat, clean surface
- Organize all skateboard components
- Ensure proper lighting
- Component Verification
- Check deck for any manufacturing defects
- Inspect trucks and wheels for alignment
- Verify hardware completeness
- Initial Assembly Preparation
- Position deck with graphic side down
- Lay out trucks and mounting hardware
- Prepare grip tape for application
Most skateboarders are between 6-24 years old. They usually prefer deck widths of 8.0 to 8.5 inches. A well-set-up skateboard is safer and performs better.
Pro Tip: Take your time during assembly. Rushing can lead to mistakes that might compromise your skateboard’s performance and safety.
A well-assembled skateboard makes your ride better and safer. With patience and care, you’ll have a skateboard that fits your style and skill.
Truck Installation and Alignment
Installing skateboard trucks right is key for great performance and safety. A good guide shows how to mount them for better board feel and balance.
Starting your skateboard setup, learning about truck installation is vital. Trucks link your wheels to the deck, controlling how you steer.
Proper Mounting Techniques
To mount trucks securely, follow these steps:
- Align the truck with the deck’s holes
- Use quality hardware that fits your deck
- Tighten bolts evenly
- Make sure the truck baseplate touches the deck
Kingpin Adjustment Tips
The kingpin is the bolt that holds the truck together. Adjusting it right lets you:
- Change how your board turns
- Improve stability on the board
- Make the ride your own
Baseplate Positioning Guide
Where you place the baseplate affects your board’s performance. Keep these points in mind:
| Positioning Factor | Impact on Ride |
|---|---|
| Centered Alignment | Balanced weight |
| Parallel Mounting | Stability |
| Consistent Tightness | Less vibration |
Learning these steps will help you make a ride that’s both reliable and fits your style.
Wheel Selection and Installation
Choosing the right wheels is key when setting up a skateboard. The right wheel can make your ride smooth and tailored to your style.

When picking wheels, consider a few important factors. The best tips for setting up your skateboard start with finding wheels that fit your riding style.
- Wheel Diameter: Ranges typically from 50-60mm
- Street skating: 50-54mm wheels
- Cruising: 55-60mm wheels
- Durometer (Hardness): Determines grip and smoothness
- Soft wheels (78A-87A): Better for rough surfaces
- Hard wheels (99A-104A): Ideal for smooth surfaces
When installing wheels, make sure they’re securely attached. Start by threading the axle nut carefully. Leave enough room for smooth rotation. Avoid over-tightening, as it can stop wheels from spinning.
Pro tip: Check wheel alignment and tighten nuts progressively. Your goal is a setup that gives you maximum control and less friction during your ride.
Bearing Installation and Maintenance
Understanding how to install skateboard bearings is key for a smooth ride. These small parts greatly affect your board’s performance and how it feels to ride.

Bearings are tiny but very important for your skateboard. They are 22 millimeters wide, 7 millimeters thick, and fit standard axles perfectly.
Cleaning and Lubrication Methods
Keeping bearings clean and well-lubricated is important. Here’s how to do it:
- Use isopropyl alcohol (90% concentration) for cleaning
- Dry bearings in a well-ventilated area for 30 minutes
- Apply skateboard bearing lubricant
- Choose lubricants with ISO VG 15-22 viscosity
Proper Seating Techniques
Installing bearings needs precision. Make sure they fit right by:
- Aligning bearings with wheel cores
- Using bearing pushers to avoid damage
- Checking for smooth rotation
- Ensuring at least 10 seconds of spin
Speed Rating Understanding
The ABEC rating system helps pick the right bearings. Higher ratings like ABEC 7 or 9 mean better tolerance and smoother spinning. Choose ceramic or chromium steel bearings for more durability and to resist corrosion.
Pro tip: Never over-tighten axle nuts, as this can compress bearings and restrict wheel rotation.
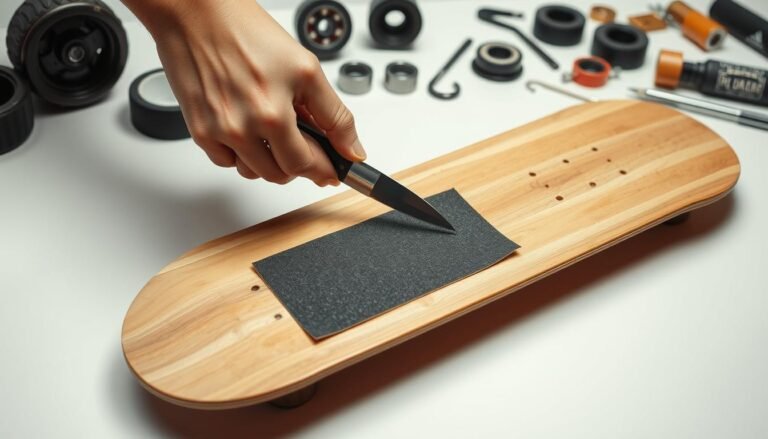
Grip Tape Application Techniques

Learning how to apply grip tape is key for any skater. It adds traction and makes your skateboard unique. A good grip tape setup is essential for a great ride.
Before you start, make sure you have these tools:
- Grip tape sheet
- Sharp utility knife
- Metal file or sandpaper
- Ruler or straight edge
Applying grip tape needs care and patience. Start by lining up the tape along the deck’s length. Make sure there are no air bubbles or wrinkles.
Pro skaters share these tips for perfect grip tape:
- Clean the deck well
- Press the tape slowly from one end to the other
- Trim the edges with a file
- Make small cuts around truck holes
| Grip Tape Type | Traction Level | Best For |
|---|---|---|
| Standard Grip | Medium | All-around skating |
| Extra Coarse | High | Technical street skating |
| Soft Grip | Low | Cruising and casual riding |
About 60% of skateboard injuries could be avoided with proper prep and grip tape. Take your time and work carefully. This will give you a smooth, safe ride.
Hardware Selection and Assembly
Building a reliable skateboard needs careful attention to hardware. Your skateboard hardware installation guide starts with understanding the critical components. These components connect different parts of your skateboard.

When you start a complete skateboard assembly guide, picking the right hardware is key. It affects performance and safety. Skateboarders need to consider several key factors during hardware selection.
Bolt Types and Sizes
Skateboard hardware includes specific bolt lengths and types for mounting trucks to the deck. The standard hardware set includes:
- Phillips head bolts
- Mounting lengths ranging from 7/8″ to 1-1/4″
- Hardened steel material for durability
Proper Tightening Sequence
Achieving the perfect hardware installation requires a strategic tightening approach. Follow this sequence for optimal results:
- Start with diagonal bolt pairs
- Apply gentle, even pressure
- Avoid over-tightening to prevent deck damage
Maintenance Schedule
Regular hardware maintenance ensures your skateboard remains safe and performs at its best. Recommended maintenance includes:
- Monthly bolt tension check
- Replacing worn or rusted hardware
- Cleaning mounting areas to prevent corrosion
“Good hardware is the backbone of a reliable skateboard setup.” – Professional Skate Technician
Testing Your Setup for Safety

Setting up your skateboard is just the beginning. You need to make sure it’s safe and ready for riding. A detailed safety check is key to avoid accidents and ensure your board works well.
Before you start riding, do these important safety checks:
- Check truck tightness and alignment
- Test wheel spin and rotation
- Verify grip tape adhesion
- Inspect hardware connections
When setting up your skateboard, safety comes first. Press down on the deck gently to check its strength. Listen for any unusual creaking or sounds that might indicate problems.
Comprehensive Safety Checklist
| Inspection Area | What to Check | Ideal Condition |
|---|---|---|
| Trucks | Mounting and tightness | Secure, no wobbling |
| Wheels | Spin and alignment | Smooth rotation |
| Deck | Structural integrity | No cracks or damage |
| Bearings | Lubrication and movement | Clean and free-spinning |
First, test your board in a safe, flat area. Push it gently and watch how it moves. Listen for any odd sounds and feel for smoothness. If something feels wrong, go back and check your setup again.
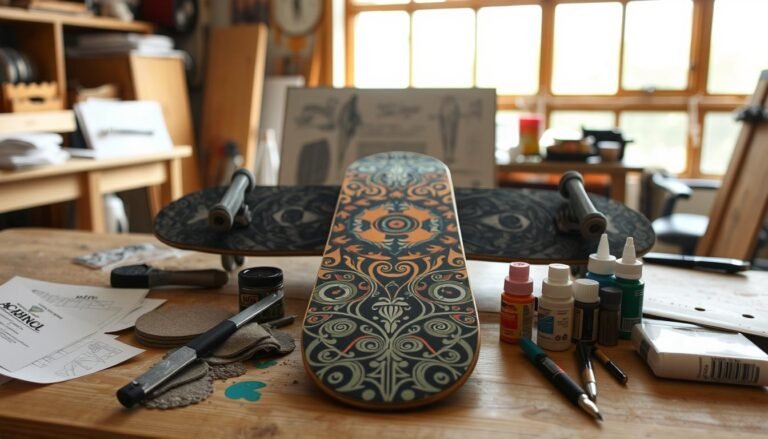
Customizing Your Ride Experience
Creating the perfect skateboard is more than just putting it together. It’s about making it your own, fitting your style and skating needs. The best tips involve tweaking each part for better performance and comfort.

Setting up your skateboard deck and trucks is key. It can make a big difference in how you ride.
Truck Tightness Adjustments
Truck tightness affects how your skateboard turns and stays stable. Here’s how to find your ideal setting:
- Looser trucks make turning easier and more flexible
- Tighter trucks help you go faster and stay steady
- Start with medium tightness if you’re new to skateboarding
Wheel Hardness Selection
Wheel hardness is important for how you skate:
| Wheel Durometer | Skating Surface | Recommended Use |
|---|---|---|
| 78A-87A | Rough Streets | Cruising |
| 88A-95A | Smooth Surfaces | Street Skating |
| 96A-99A | Skateparks | Technical Tricks |
Bearing Speed Preferences
Bearing speed ratings help you pick the right speed for your skate. Higher ABEC ratings mean more precision. But, they’re not the only thing that matters in how your skateboard performs.
“Your skateboard is an extension of yourself—customize it to match your style and skill level.”
Common Setup Mistakes to Avoid

Setting up a skateboard for beginners can be challenging. Many people make big mistakes during the assembly process. These errors can affect their riding experience and safety.
Skaters often make several common mistakes when preparing their board:
- Truck Tension Troubles: Over-tightening or under-tightening trucks disrupts board responsiveness
- Incorrect wheel alignment causing uneven riding performance
- Improperly applied grip tape reducing board control
- Mismatched hardware leading to equipment failure
Knowing these mistakes helps skaters build a better and more enjoyable skateboard. Paying close attention to details during setup avoids future problems.
Important areas to focus on during assembly include:
- Checking truck alignment
- Ensuring proper wheel spacing
- Applying grip tape smoothly
- Selecting compatible components
Beginners should take their time to learn and practice each step. Being patient during setup leads to better performance and safer rides.
Maintenance Tips for Longevity
Keeping your skateboard in top shape is key for both fun and safety. A well-kept skateboard means a smoother ride and longer life. Regular care stops early wear and saves you money.
Your skateboard guide should have a detailed maintenance plan. Here are some important steps to keep your board in great condition:
- Clean your board after each ride
- Check hardware and truck tightness weekly
- Rotate wheels to ensure even wear
- Store your skateboard in a cool, dry place
Wheel care is vital for your skateboard’s performance. Experts say to rotate wheels in an X-pattern to spread wear evenly. Most skaters prefer wheels with a durometer between 78A and 101A for best performance.
“A well-maintained skateboard is the secret to consistent performance and longevity.” – Professional Skate Technician
Don’t forget to check your wheel and bearing condition. Wheels usually last 3-6 months, depending on how often you skate and where. Bearings need cleaning every 2-3 months or when they start to slow down.
- Replace wheels with flat spots immediately
- Clean bearings with specialized solvent
- Lubricate bearings after cleaning
- Inspect trucks for any structural damage
By sticking to these maintenance tips, you’ll make your skateboard last longer and ride safer and smoother.
Conclusion
Learning to assemble a skateboard takes time and effort. You’ve picked up key skills for making a skateboard that fits your style and skill level. The guide you followed has given you a good base for understanding how to build a board.
Every step, from choosing the right deck to setting up trucks and bearings, helps make your ride better. Skateboarding is a personal art where your taste matters a lot. Try out different setups and feel free to change things as you get better.
Remember, safety and keeping your board in good shape are key. Regular checks, cleaning, and knowing how your board works will make it last longer and help you skate better. Keep practicing, stay open to learning, and enjoy the journey to becoming a skilled skateboarder.
Your skateboard is not just a piece of gear; it’s a part of your creativity and passion. Accept the learning process, keep working to get better, and ride with confidence. You’ve built a board that’s perfect for you.
FAQ
How much does it cost to set up a complete skateboard?
A basic skateboard setup costs between 0 to 0. This depends on the quality of the parts. For beginners, expect to pay around 0-0. Professional-grade boards can cost over 0.
Make sure to budget for a good deck, trucks, wheels, bearings, and grip tape. This will ensure your skateboard is reliable and safe.
How long does it take to set up a skateboard?
Setting up a skateboard for the first time can take 30-60 minutes. With practice, you can do it in 15-20 minutes. Having the right tools and a step-by-step guide will help you set it up faster.
What tools do I need to set up a skateboard?
You’ll need a skateboard tool, a Phillips head screwdriver, and a razor blade or box cutter for the grip tape. A file or razor blade is also good for the grip tape edges. A hammer can help with mounting the deck and trucks.
Some skaters also suggest using lubricant for the bearings.
How do I know what size skateboard to choose?
The size of your skateboard depends on your height, shoe size, and skating style. Riders under 5’3″ should look for a deck 7.5-8″ wide. Taller riders might prefer 8-8.5″ decks.
Street skaters like narrower boards, while cruisers and transition skaters prefer wider decks for stability.
How often should I replace skateboard components?
Replace parts based on how often you use them and how worn they are. Decks usually last 2-4 months for frequent skaters. Wheels can last 3-6 months, bearings 1-2 years, and trucks several years with care.
Always check your equipment for damage or excessive wear.
Can I set up a skateboard if I’m a complete beginner?
Yes, you can! With patience, the right tools, and a guide, beginners can set up their first skateboard. Take your time, follow the instructions carefully, and don’t be afraid to ask for help.
Visit a local skate shop for guidance if needed.
How tight should my trucks be?
Truck tightness is up to personal preference. Looser trucks are easier to turn but less stable. Tighter trucks are more stable but harder to turn.
Beginners often start with medium-tight trucks and adjust as needed. Experiment to find what works best for you.
What’s the difference between street and cruiser decks?
Street decks are narrower (7.5-8.25″), lighter, and have a more pronounced concave for tricks. Cruiser decks are wider (8.5-9″), have a milder concave, and are designed for smoother riding.
Choose based on your skating style and preferences.
How do I maintain my skateboard?
Regular maintenance includes cleaning bearings, checking truck and hardware tightness, and inspecting wheels for wear. Store your board in a cool, dry place.
Clean your board after riding in wet conditions, lubricate bearings periodically, and replace parts as needed. This ensures your skateboard performs well and is safe to use.