DIY Skateboard Ramp Building Guide: Step-by-Step Tutorial
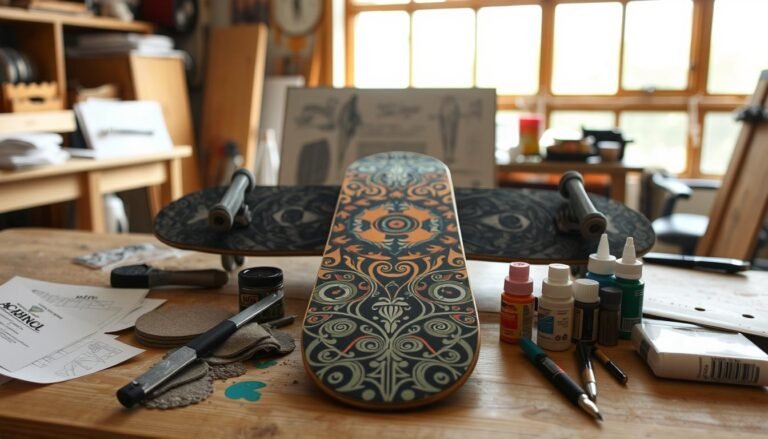
Skateboarding fans can turn their passion into a reality by building a custom ramp. This DIY project lets you create a space that fits your skills and style. It’s a fun way to make your own skate area.
Building a skateboard ramp is more than just building—it’s about making a personal space for skating. With the right planning and tools, you can make a top-notch ramp. It will boost your skills and give you hours of fun.
This guide will take you through every step of building a skateboard ramp. We’ll cover picking materials to the final setup. You’ll learn key techniques for a safe, strong, and well-made ramp.
Key Takeaways
- DIY skateboard ramps cost between $200 to $500 in materials
- Most ramps require 10-20 hours of construction time
- Plywood remains the most popular ramp-building material
- Safety equipment is key during building and use
- Personal ramps can greatly improve your skating skills
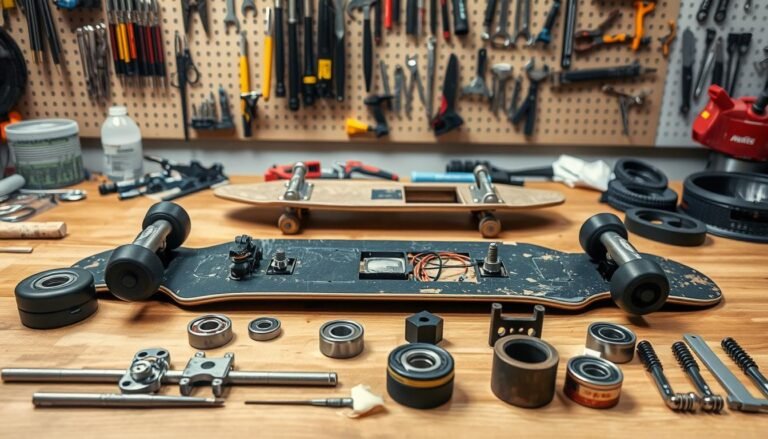
Essential Tools and Materials for Ramp Construction
Building a skateboard ramp needs careful planning and the right tools and materials. Skate ramp construction tips start with understanding the critical components. These ensure durability, safety, and performance for your DIY project.
Crafting the perfect skateboarding environment at home is more than just enthusiasm. The best materials for skate ramps can greatly impact your riding experience and project longevity.
Power Tools and Hardware Requirements
Essential power tools for ramp construction include:
- Circular saw for precise wood cutting
- Cordless drill with multiple bit sizes
- Electric sander for smooth surface preparation
- Measuring tape and level for accurate measurements
- Safety goggles and hearing protection
Premium Grade Materials List
Selecting high-quality materials is key for skate ramp construction. Here are the recommended materials:
- Marine-grade plywood (3/4 inch thickness)
- Pressure-treated lumber for frame support
- Exterior-grade screws (deck screws)
- Waterproof wood sealant
- Smooth hardboard for riding surface
Safety Equipment Checklist
Personal protection is vital during ramp construction and skating:
- Hard hat
- Safety glasses
- Work gloves
- Steel-toed boots
- Dust mask
Investing in quality tools and materials will create a safe and enjoyable skateboarding space. It will withstand various weather conditions and provide years of riding pleasure.
Understanding Ramp Dimensions and Design

Creating the perfect skateboard ramp is all about careful planning. The design depends on several factors. These include the space available, the rider’s skill level, and how the ramp will be used.
There are many types of ramps, each giving a unique skating experience. Skaters can pick the right ramp based on their skill and the space they have:
- Mini ramps for beginners and limited spaces
- Quarterpipes for smooth transitions
- Launch ramps for practicing aerial tricks
- Complex multi-section ramps for advanced riders
The size of the ramp is very important. Smaller ramps are 2-4 feet high, while pro ramps can be 8-12 feet high. The width and curve of the ramp affect how hard it is to skate and the style of skating.
| Ramp Type | Height Range | Skill Level |
|---|---|---|
| Mini Ramp | 2-4 feet | Beginner to Intermediate |
| Quarterpipe | 3-6 feet | Intermediate |
| Full Transition Ramp | 6-12 feet | Advanced |
When designing skate ramps, safety is key. Smooth surfaces, proper transitions, and the right size are essential. They help make skating fun and safe.
Skateboard Ramp Building Guide: Planning Phase
Building the perfect skateboard ramp starts long before you cut any wood. The planning phase is key for a safe, durable, and fun skate experience. A good plan can save you time, money, and trouble later.
Building a ramp needs careful thought about several important factors. Your journey to build a skateboard ramp begins with planning. This planning covers many critical points.
Site Selection and Preparation
Finding the right spot is the first step in your ramp project. Think about these important things:
- Flat, level ground with little slope
- Enough space for the ramp’s size
- Protection from strong winds and too much moisture
- Close to electrical outlets for tools
- Enough room around the ramp
Budget Considerations
Having a solid budget is important to avoid financial stress. Here’s how to break down your costs:
- Materials (plywood, lumber, hardware)
- Tools (if you don’t already have them)
- Protective coatings and sealants
- Safety gear
- Extra money for unexpected costs
Timeline Planning
Managing your time well is essential for a successful ramp project. Expect it to take several weekends, based on your skill and time. Make a flexible plan that includes time for delays and detailed work.
Pro Tip: Always add extra time for unexpected challenges and detailed craftsmanship.
Foundation and Base Construction

Building a strong foundation is key for a successful skate ramp. The base affects the ramp’s stability, how it performs, and safety. Skaters need a flat, strong base that can handle tough riding and weather.
Before you start building your skate ramp, follow these important steps:
- Choose a flat, well-drained surface
- Remove grass, rocks, and debris thoroughly
- Level the ground using a professional-grade laser level
- Create a slight slope for water drainage
The materials you choose for your foundation are very important. Here are some good options:
- Pressure-treated lumber for ground contact
- Concrete footings for permanent installations
- Gravel underlayment for drainage
- Sturdy support posts (4×4 or 6×6 wooden beams)
Experts say to anchor your base frame well. Use galvanized carriage bolts, exterior-grade screws, and make sure each connection is tight and square. Being precise in building the foundation helps avoid problems later and makes for a better ride.
Building the Transition Framework
Building the perfect skateboard ramp needs precision and planning. The transition framework is key to your ramp’s success. It affects how well the ramp performs and how riders feel.

When making plans for your ramp, focus on the transition framework. Every part is important for a smooth ride. It should challenge and thrill skaters.
Creating Perfect Curves
Getting the curve just right is essential. Here’s how to do it:
- Use a flexible curve template for consistent radius
- Measure and mark transition points precisely
- Cut plywood sheets with a circular saw for smooth edges
- Sand edges to eliminate possible snag points
Support Structure Assembly
A strong support structure keeps your ramp stable and long-lasting. Think about these important points:
- Choose pressure-treated lumber for base supports
- Make a level foundation with sturdy 2×4 framing
- Ensure at least 16-inch spacing for maximum strength
- Use galvanized deck screws for secure connections
Framework Reinforcement
Strengthening your ramp’s framework stops warping and boosts durability. Smart bracing turns a basic ramp into a top-notch skating spot.
- Add diagonal cross-bracing for better structural integrity
- Use metal angle brackets at key connection points
- Check for level surfaces and adjust as needed
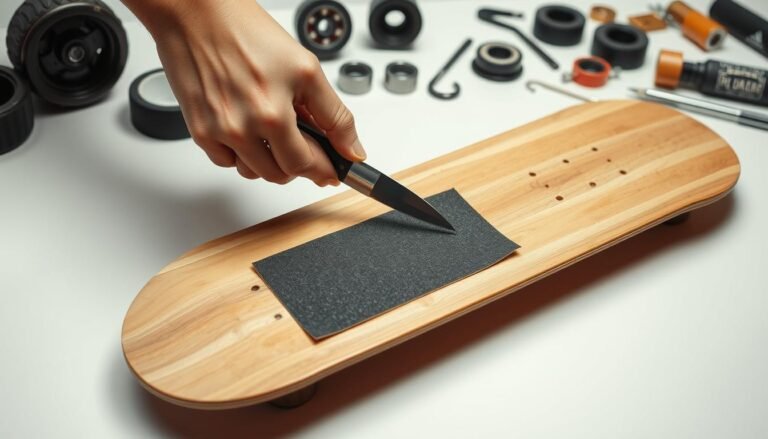
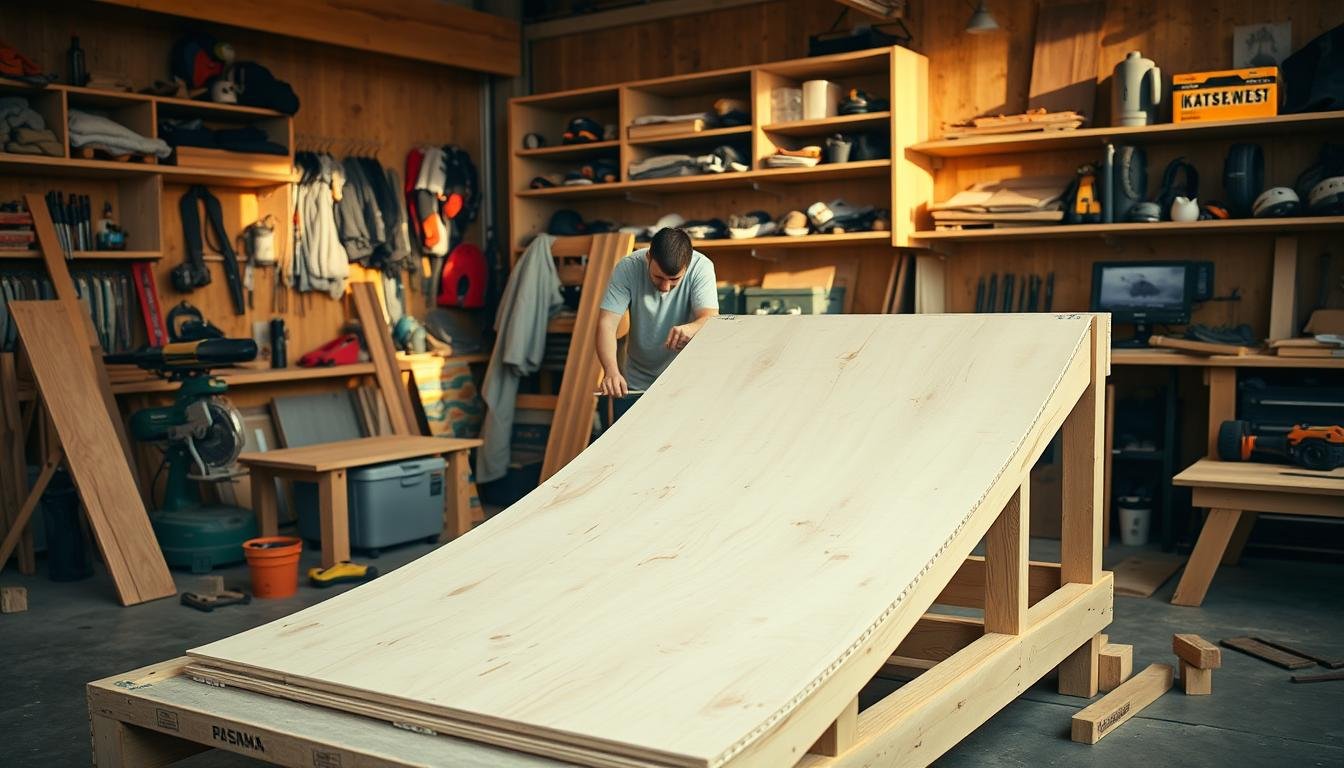
Installing the Riding Surface
Choosing the right materials for skate ramps is key to a smooth ride. The right material balances performance and durability. It makes your skateboarding experience better.

Skate ramp builders suggest top materials for the riding surface. The most popular are:
- High-grade Plywood: It’s affordable and easy to find.
- Skatelite Pro: A premium synthetic surface.
- Masonite: A smooth hardboard material.
- Fiber-reinforced panels.
Installing the riding surface needs precision. Here are the important steps:
- Measure the ramp framework carefully.
- Cut materials with a circular saw for clean edges.
- Make sure panels fit together tightly and seamlessly.
- Use exterior-grade screws for a secure attachment.
| Material | Cost | Durability | Performance |
|---|---|---|---|
| Skatelite Pro | High | Excellent | Superior |
| High-grade Plywood | Low | Good | Moderate |
| Masonite | Medium | Fair | Good |
Professional tip: Always seal the surface with a weather-resistant coating. This protects it from moisture and extends its life. The right preparation and material choice ensure a smooth, lasting ride.
Adding the Platform Decks
Building the perfect platform for your skateboard ramp is key. It’s where skaters start and where safety meets fun. A well-made platform is essential for a smooth ride into the ramp’s twists and turns.

Creating a great platform deck needs careful planning and precise measurements. Skaters use these areas to get ready and build up speed for cool tricks.
Platform Construction Steps
- Measure the top width of your ramp precisely
- Select pressure-treated lumber for durability
- Cut support joists to match ramp width
- Secure joists with galvanized deck screws
- Create a level surface using 3/4-inch plywood
Safety Rail Installation
Safety rails are a must in skateboard ramp building. They keep skaters safe and help them balance during tricky moves.
| Rail Material | Recommended Height | Mounting Method |
|---|---|---|
| Galvanized Steel | 36-42 inches | Bolt-through mounting |
| Aluminum | 38-40 inches | Welded bracket attachment |
“A well-constructed platform is the gateway to skateboarding excellence.” – Pro Skate Magazine
When putting in safety rails, make sure they’re securely anchored. They need to handle a lot of pressure. Use strong bolts and check them often to keep everything safe.
Coping Installation and Edge Protection

Coping installation is key in making your skate ramp last and perform well. The top edge needs careful work to ensure a smooth ride.
Choosing the right coping material is important. Builders often pick from galvanized steel pipes, aluminum tubing, or stainless steel rails.
- Galvanized steel pipes
- Aluminum tubing
- Stainless steel rails
Each material has its own benefits. Galvanized steel is durable, while aluminum is lighter and resists corrosion.
Installing coping needs precise measurements and strong attachment. Here are some tips for doing it right:
- Measure the ramp’s top edge carefully
- Cut coping to exact length
- Drill mounting holes at consistent intervals
- Secure with robust mounting hardware
| Coping Material | Durability | Weight | Cost |
|---|---|---|---|
| Galvanized Steel | High | Heavy | Moderate |
| Aluminum | Medium | Light | Low |
| Stainless Steel | Very High | Medium | High |
Edge protection is more than just coping. Seal wooden edges with weather-resistant materials to prevent water damage. This keeps your ramp safe and lasting longer.
Weather Protection and Sealing
Keeping your skateboard ramp safe from the weather is key. The right materials need weatherproofing to last long and stay safe for skaters.
Choosing the best waterproofing methods can make your ramp last longer. Skaters who seal their ramps well save money and avoid damage.
Essential Waterproofing Techniques
- Marine-grade sealants offer top-notch water protection
- Epoxy-based coatings act as a shield against moisture
- UV-resistant clear coats stop sun damage and color loss
Long-Term Maintenance Strategies
- Check your ramp every three months for damage
- Put on waterproof sealant every year
- Fix small issues right away to avoid big problems
Studies show that 90% of weather damage can be prevented with regular sealing and painting. This makes your ramp last longer and stay in good shape.
Pro tip: Pick weather-resistant materials for your skate ramp to cut down on upkeep.
Regular care keeps your ramp in top shape and makes skating safer. By using these weather protection tips, skaters can enjoy their ramps for many years.
Safety Features and Requirements

When you start building a skateboard ramp, safety is key. Skateboarding can be risky, with about 60% of injuries from falls. Adding important safety features can help prevent accidents.
Important safety tips for your DIY skateboard ramp include:
- Non-slip surface treatments
- Protective padding
- Secure railing systems
- Proper structural reinforcement
Studies show that non-slip surfaces can cut fall injuries by up to 50%. Make sure your ramp has a smooth, textured surface. This helps riders grip the ramp better and slip less.
| Safety Feature | Injury Reduction | Recommended Implementation |
|---|---|---|
| Helmet Use | 70% Injury Prevention | Mandatory for All Users |
| Non-Slip Surface | 50% Fall Reduction | Grip Tape or Textured Coating |
| Protective Padding | 45% Impact Protection | Edge Guards and Rail Covers |
When planning your ramp, check local laws and permits. Safety should never be an afterthought. Mini ramps at 30-45 degree angles are safer for beginners, lowering fall risks.
Use screws over nails to lower injury risks from sharp edges by 25%. Keeping your ramp in good shape can add 30% to its life and keep it safe.
Expert Tips for Smooth Transitions
Building a skate ramp is more than just following steps. It’s about mastering the fine details that make a ramp stand out. You need precision, patience, and a solid plan to succeed.

For those new to skate ramp building, it’s key to steer clear of common mistakes. This way, you can create a ramp that’s both safe and fun to ride.
Common Construction Mistakes to Dodge
- Neglecting proper wood moisture content
- Inconsistent transition curve measurements
- Inadequate framework reinforcement
- Skipping critical surface preparation steps
- Using low-quality or warped plywood
Professional Building Techniques
Professional ramp builders pay close attention to three key areas:
- Precision Measurements: Use laser levels and digital angle finders for perfect curves
- Material Selection: Choose marine-grade plywood and pressure-treated lumber
- Structural Integrity: Create robust support frameworks with strategic bracing
By following these tips, you can take your ramp building skills to the next level. Your ramp will be smooth, durable, and ready for action.
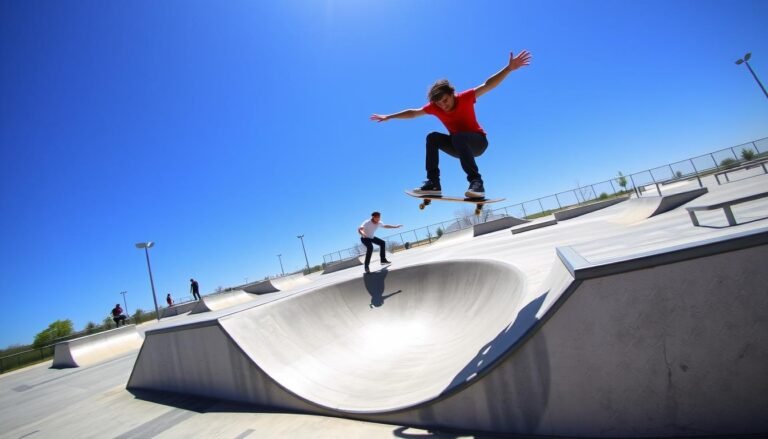
Testing and Breaking In Your Ramp

After you finish building your DIY skate ramp, it’s time to test and break it in. This step makes sure your ramp is safe, smooth, and ready for skateboarding.
First, do a safety check on your DIY skate ramp. Look at every connection, surface, and part to make sure it’s stable and strong. Check for screws sticking out, uneven spots, or weak areas that could be dangerous.
- Inspect all wooden surfaces for splinters or rough edges
- Verify structural support and framework rigidity
- Test coping and transition connections
- Ensure proper waterproofing and sealant application
To break in your DIY skate ramp, start with light riding. Slowly get more intense to get to know the ramp. Skaters say to begin with easy rolls and then try harder tricks.
Pro tip: Always wear protective gear during initial testing, including a helmet, knee pads, and elbow protection.
Pay attention to how the ramp feels during your first rides. If you hear strange sounds, feel it flexing, or see it moving in ways it shouldn’t, it might have problems. Take care of these issues right away to keep your ramp safe and working well.
Remember: A well-tested DIY skate ramp is the foundation of an epic skating experience!
Conclusion
Building a skateboard ramp is a fun DIY project. It needs patience, skill, and creativity. Your guide has walked you through every step, from picking materials to adding the final touches. Creating your own skating space is incredibly rewarding.
Safety is key when building a skateboard ramp. Always check your ramp for any damage, smooth surfaces, and wear. Keeping it in good shape will make sure it lasts longer and is safe for everyone.
Your custom ramp will grow with your skateboarding skills. It’s not just a structure; it’s a place for growth, creativity, and self-expression. Remember, every great skater started where you are now, with determination and a love for learning.
We encourage you to share your ramp-building stories with the skating community. Your experiences and tips could help others who are starting their ramp-building journey.
FAQ
How much does it cost to build a skateboard ramp?
Building a skateboard ramp costs between 0 and ,000. A simple ramp for your backyard might cost 0-
FAQ
How much does it cost to build a skateboard ramp?
Building a skateboard ramp costs between $500 and $3,000. A simple ramp for your backyard might cost $800-$1,500. The price depends on the wood quality, size, and extra features.
What type of wood is best for building a skateboard ramp?
Birch plywood or marine-grade plywood are the best choices. They’re durable, weather-resistant, and smooth. Choose 3/4-inch thick sheets with few knots and a smooth finish for the best ride.
Do I need special permits to build a skateboard ramp?
Permits vary by location. Check with your local zoning office about backyard rules. Some places need permits for permanent ramps, while others have rules about height, placement, and noise.
How long does it take to build a skateboard ramp?
Building a ramp takes 2-5 days for beginners. It can take 20-30 hours over a weekend. This includes planning, getting materials, and building.
What safety equipment do I need when building a skateboard ramp?
You’ll need safety glasses, gloves, hearing protection, dust masks, steel-toed boots, and a hard hat. Always follow safety guidelines when using power tools and wear the right gear.
Can I build a skateboard ramp on an uneven surface?
No, it’s not recommended. A flat surface is key for stability and performance. If your spot isn’t level, you’ll need to level it using ground leveling, concrete, or a raised platform.
How do I maintain my skateboard ramp?
Keep it up by checking screws, inspecting the surface, and applying sealant yearly. Clean and dry it regularly. Do quarterly checks and fix any damage right away to keep it lasting.
What’s the recommended size for a beginner skateboard ramp?
Beginners should start with a 4-foot wide, 3-4 foot tall ramp. It’s challenging but not too hard. As you get better, you can make it bigger and more complex.
Can I build a skateboard ramp if I’m not very experienced with construction?
Yes, you can. Basic carpentry skills help, but you can learn with planning and watching videos. Start simple and get help from someone more experienced if needed.
What’s the best way to protect my ramp from weather damage?
Use weather-resistant materials and apply exterior-grade sealant. Consider a cover or shelter in bad weather. Regular maintenance and sealing prevent damage and rot.
,500. The price depends on the wood quality, size, and extra features.
What type of wood is best for building a skateboard ramp?
Birch plywood or marine-grade plywood are the best choices. They’re durable, weather-resistant, and smooth. Choose 3/4-inch thick sheets with few knots and a smooth finish for the best ride.
Do I need special permits to build a skateboard ramp?
Permits vary by location. Check with your local zoning office about backyard rules. Some places need permits for permanent ramps, while others have rules about height, placement, and noise.
How long does it take to build a skateboard ramp?
Building a ramp takes 2-5 days for beginners. It can take 20-30 hours over a weekend. This includes planning, getting materials, and building.
What safety equipment do I need when building a skateboard ramp?
You’ll need safety glasses, gloves, hearing protection, dust masks, steel-toed boots, and a hard hat. Always follow safety guidelines when using power tools and wear the right gear.
Can I build a skateboard ramp on an uneven surface?
No, it’s not recommended. A flat surface is key for stability and performance. If your spot isn’t level, you’ll need to level it using ground leveling, concrete, or a raised platform.
How do I maintain my skateboard ramp?
Keep it up by checking screws, inspecting the surface, and applying sealant yearly. Clean and dry it regularly. Do quarterly checks and fix any damage right away to keep it lasting.
What’s the recommended size for a beginner skateboard ramp?
Beginners should start with a 4-foot wide, 3-4 foot tall ramp. It’s challenging but not too hard. As you get better, you can make it bigger and more complex.
Can I build a skateboard ramp if I’m not very experienced with construction?
Yes, you can. Basic carpentry skills help, but you can learn with planning and watching videos. Start simple and get help from someone more experienced if needed.
What’s the best way to protect my ramp from weather damage?
Use weather-resistant materials and apply exterior-grade sealant. Consider a cover or shelter in bad weather. Regular maintenance and sealing prevent damage and rot.