How to Master Skateboard Grip Tape Installation
Skateboarding is all about precision and skill. Grip tape is key for both performance and safety. Learning to install grip tape can change your ride, giving you a better feel with your board.
For skaters, grip tape is more than just a surface. It’s vital for control, stability, and pulling off tricks. Whether you’re new or experienced, knowing how to install grip tape can boost your skills.
Pro skateboarders stress the need for proper grip tape application. The right grip tape improves grip and prevents accidents. It helps keep control during tough tricks.
Key Takeaways
- Grip tape is essential for skateboard performance and safety
- Proper installation requires specific tools and techniques
- Quality grip tape enhances board control and rider confidence
- Regular maintenance extends grip tape effectiveness
- Custom grip tape designs can personalize your skateboard
Understanding Skateboard Grip Tape Fundamentals
Skateboard grip tape is key to a good skateboarding experience. It helps skaters stay in control and stable. This is important for tricks and moving on different surfaces.
Types of Grip Tape Brands
Choosing the right grip tape brand is important for better skating. Here are some top picks:
- Mob Grip Tape – Known for exceptional durability
- Black Magic Grip Tape – Offers superior traction
- Jessup Grip Tape – Budget-friendly with solid performance
- Shake Junt Grip Tape – Popular among professional skaters
Benefits of Quality Grip Tape
High-quality grip tape offers many benefits for skateboard care:
- Enhanced traction and board control
- Improved rider confidence
- Reduced slipping during complex maneuvers
- Extended deck longevity
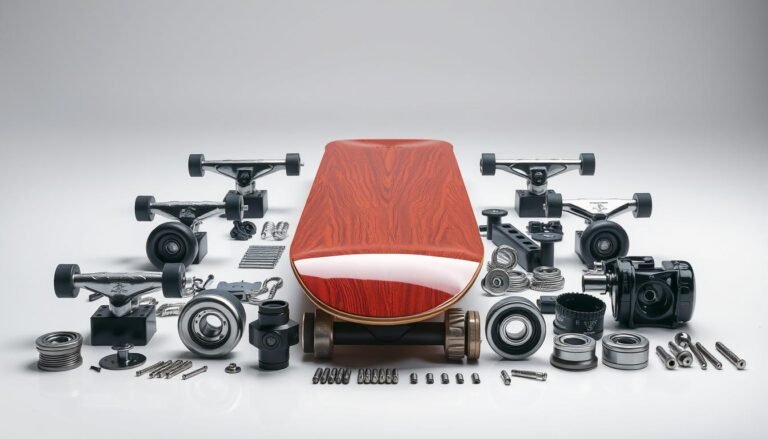
Grip Tape Components and Materials
| Component | Material | Primary Function |
|---|---|---|
| Abrasive Surface | Silicon Carbide | Provide Maximum Grip |
| Adhesive Layer | Strong Synthetic Adhesive | Ensure Secure Deck Attachment |
| Backing Material | Durable Sandpaper-like Substrate | Support Overall Grip Tape Structure |
Knowing about skateboard grip tape basics helps riders choose wisely. Good selection and care can greatly improve skating performance and safety.
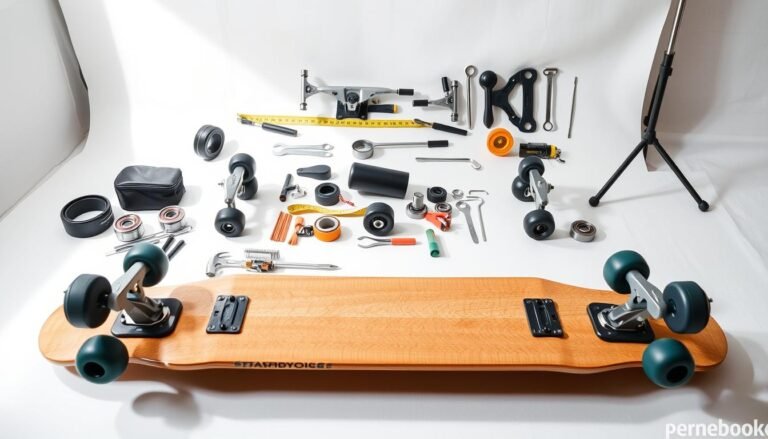
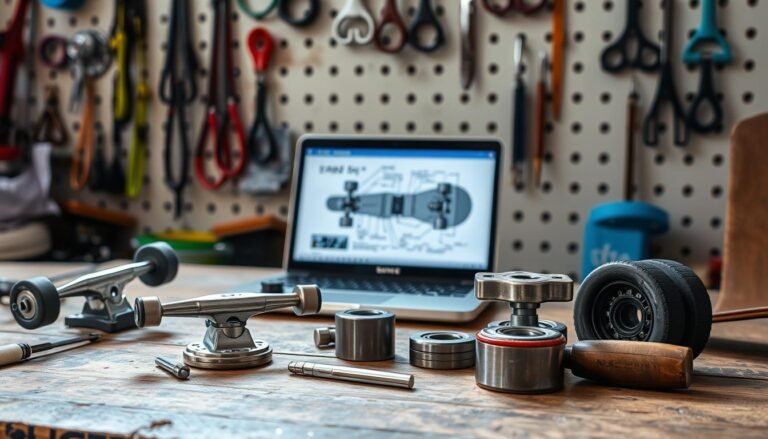
Essential Tools for Grip Tape Installation

Getting ready for grip tape installation means having the right tools. Skaters know that using the best tools is key to a great grip tape job.
Here are the must-have tools for a top-notch grip tape job:
- Razor Blade or Utility Knife: Essential for cutting and trimming grip tape accurately
- Screwdriver: Needed to remove old parts and get the deck ready
- Metal File: Smooths out edges for a clean grip tape fit
- Soft Cloth: For cleaning the deck before applying tape
- Tape Measure: Makes sure the tape is placed right
Choosing the right tools for grip tape is important. Brands like Jessup Manufacturing Company suggest using sharp, clean tools for the best results.
Pro Tip: Always use a fresh razor blade to prevent ragged edges and ensure clean cuts during grip tape application.
Different grip tape brands like MOB, Jessup, and Enuff have their own features. But the way you install it is mostly the same. The standard size for shortboard grip tape is 9″ x 33″. Make sure your tools can handle this size.
Using the right tools will make installing grip tape easier, more precise, and successful.
Preparing Your Skateboard Deck for Installation
Getting your skateboard deck ready is key for a great grip tape job. Before you start, you need to do a few important things. This will help your grip tape stick well and last long.
Preparing your skateboard deck involves three main steps. These steps will help you get a top-notch grip tape job:
- Surface cleaning
- Removing old grip tape
- Comprehensive deck inspection
Cleaning the Deck Surface
A clean deck is vital for good grip tape adhesion. Begin by wiping away dirt, dust, or old tape with a soft cloth and rubbing alcohol. This makes sure the new tape will stick well to the deck.
Removing Old Grip Tape
To replace the grip tape, take off the old one carefully. Warm the adhesive with a hairdryer to make it easier to remove. Peel slowly to avoid harming the deck.
Surface Inspection Guidelines
Check your skateboard deck for any damage. Look for:
- Cracks or structural weaknesses
- Warping or bending
- Surface irregularities
Pro Tip: A smooth, clean deck is the secret to a perfect grip tape installation.
By following these steps, you’ll get your deck ready for new grip tape. This ensures your skateboard will perform well and last a long time.
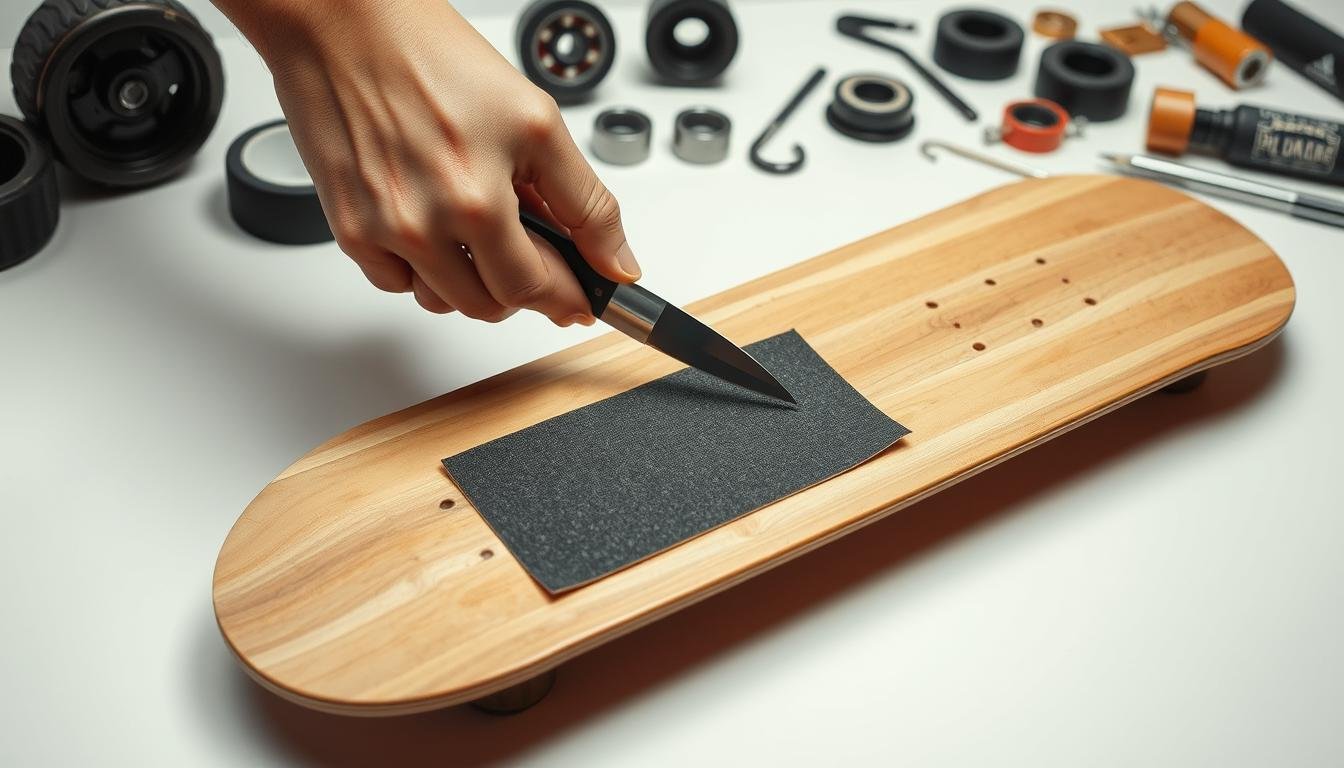
Step-by-Step Skateboard Grip Tape Installation

Learning how to put grip tape on your skateboard is key for better performance. It might look hard, but with the right steps, you can do it easily.
First, get your tools ready:
- Sharp utility knife
- Skateboard deck
- New grip tape roll
- Razor blade
- Protective gloves
Start by cleaning your skateboard deck well. Make sure it’s dust-free for the tape to stick right. Being precise helps avoid air bubbles.
Here’s how to apply grip tape right:
- Line up the tape on the deck
- Press it down from one end
- Scrape off air bubbles with a plastic tool
- Cut off extra tape with a razor
- Make holes for screws
Skaters say to take your time with grip tape. Hurrying can cause bubbles or unevenness, which hurts your board’s performance.
“A perfect grip tape application transforms your skateboard’s feel and performance.” – Pro Skater Insights
| Installation Stage | Key Considerations | Difficulty Level |
|---|---|---|
| Surface Preparation | Clean, Dry Surface | Easy |
| Tape Alignment | Precise Positioning | Medium |
| Bubble Removal | Careful Smoothing | Challenging |
| Edge Trimming | Sharp Blade Technique | Medium |
Getting better at applying grip tape takes practice. With each try, you’ll get closer to a pro finish. This will make your skateboarding better.
Measuring and Cutting Techniques
Learning to cut skateboard grip tape is key for a pro-looking deck. It’s all about precision and technique. The right way to install grip tape can really enhance your skateboarding.

- Accurate deck measurements
- Sharp cutting tools
- Careful alignment techniques
- Precise edge trimming
Precision Cutting Methods
Choosing the right tools and methods is vital. Skaters suggest:
- Use a sharp utility knife with a fresh blade
- Measure twice, cut once
- Apply light pressure during cutting
- Cut from the center outwards
Edge Trimming Strategies
Smooth edge trimming is essential for a pro look. Carefully run your blade along the deck’s edges, making a precise cut that matches the board’s shape.
“Clean edges make a perfect grip tape installation” – Professional Skate Technician
| Cutting Tool | Precision Level | Recommended Use |
|---|---|---|
| Utility Knife | High | Primary Grip Tape Cutting |
| Razor Blade | Medium | Fine Detail Trimming |
| Skateboard Grip Tape Trimmer | Very High | Professional Installations |
Practice and patience are essential for mastering grip tape cutting. Each try gets you closer to pro-level results.
Proper Adhesion Methods

Getting strong adhesion is key when you put on skateboard grip tape. The success of your grip tape installation depends on a few important techniques. These ensure a strong bond between the tape and your deck.
Skaters know that good adhesion starts with prep. Before you start, remember these important steps:
- Clean the deck surface thoroughly
- Make sure it’s dry
- Work in a room with a steady temperature
- Apply even pressure when you put it on
When applying grip tape, start at one end and move across. Slow and steady wins the race in grip tape installation. Use a hard plastic card or a special roller to get rid of air bubbles and make the surface smooth.
“The key to perfect grip tape is patience and precision” – Pro Skater Technique
Different grip tape brands might need different adhesion methods. Some say to warm the adhesive a bit, while others work best at room temperature. Always follow the maker’s specific advice for the best results.
- Press firmly from center to edges
- Avoid stretching the grip tape
- Trim excess material carefully
By learning these adhesion methods, you’ll make a skateboard deck with grip tape that looks great and rides well.
Avoiding Air Bubbles During Application
Applying skateboard grip tape needs precision and careful technique to avoid air bubbles. The right grip tape installation can make your deck look smooth and professional. On the other hand, air bubbles can make it look bumpy and affect how it performs.

Air bubbles can really impact your skateboard’s look and how well it works. Skaters should know the best ways to apply grip tape without bubbles.
Bubble Prevention Strategies
- Start from one edge of the deck and gradually work across the surface
- Use a slow and steady application method
- Apply firm, consistent pressure while laying down the grip tape
- Avoid rushing the installation process
Advanced Smoothing Techniques
Professional skaters suggest several ways to get rid of air bubbles:
- Use a plastic scraper or credit card to smooth the surface
- Gently press from the center outwards
- Utilize a pin or needle to carefully puncture stubborn bubbles
| Bubble Type | Recommended Solution | Difficulty Level |
|---|---|---|
| Small Surface Bubbles | Soft Pressure with Scraper | Easy |
| Large Air Pockets | Pin-Prick Method | Moderate |
| Persistent Bubbles | Carefully Lift and Reapply | Challenging |
Getting good at grip tape installation takes time and practice. Be patient and focus on making a smooth, bubble-free surface. This will improve your skateboard’s performance and look.
Creating Custom Grip Tape Designs

Customizing your skateboard grip tape turns your board into a personal art piece. It lets skaters add unique designs while keeping the board grippy. This way, your board becomes a reflection of your style.
Customizing your skateboard grip tape opens up new ways to make your board stand out. Skaters can use various methods to create their own designs:
- Stencil cutting for precise graphic patterns
- Layering different colored grip tapes
- Using specialized skateboard grip tape cutting tools
- Incorporating hand-drawn artwork
- Applying vinyl decals directly onto grip tape
When cutting grip tape, being precise is important. You’ll need:
- Sharp craft knife
- Cutting mat
- Metal ruler
- Fine-point marker
Pro tip: Always test your design concepts on scrap grip tape before committing to your actual skateboard deck. This helps avoid mistakes and ensures your design looks good and works well.
While making your board look cool, don’t forget its main job. The grip tape must stay grippy. Even fancy designs should not make the tape lose its grip.
Professional Tips for Long-Lasting Installation
Keeping your skateboard in top shape is key to making your grip tape last longer. Taking good care of it can make your skateboard grip tape last longer. This means better grip and a smoother ride.

Skaters know that grip tape needs regular care to stay in good shape. A good maintenance plan can stop it from wearing out too fast. This keeps your skateboard running smoothly.
Essential Maintenance Guidelines
- Clean your grip tape after each skate with a soft brush
- Don’t let grip tape get too hot or wet
- Keep your skateboard in a cool, dry place
- Check your grip tape often for wear
Durability Enhancement Strategies
To make grip tape last longer, try these tips:
- Use grip tape sealants to keep edges from peeling
- Apply sprays made for skateboard grip tape
- Change grip tape when it starts to show wear
| Maintenance Practice | Frequency | Expected Benefit |
|---|---|---|
| Soft Brush Cleaning | After Each Session | Removes Dirt, Extends Grip Tape Life |
| Edge Sealing | Monthly | Prevents Peeling |
| Comprehensive Inspection | Every 2-3 Months | Identifies Replacement Needs |
Pro Tip: Invest in quality grip tape and follow maintenance guidelines to maximize your skateboard’s performance and longevity.
Common Installation Mistakes to Avoid

Installing skateboard grip tape can be tricky, even for pros. Knowing the common mistakes helps get a professional and lasting grip tape job.
Skaters often make critical errors during grip tape installation. These mistakes can hurt the board’s performance and look. It’s key to avoid these to get a smooth, reliable grip.
- Misalignment: Not centering the grip tape can lead to uneven coverage and less control
- Stretching the grip tape too much can cause bubbling and wear it down faster
- Not preparing the surface well before applying the tape
- Using the wrong cutting methods can damage the deck or make the edges rough
Getting grip tape right needs attention to detail. Skaters should clean their deck well to ensure no dust or debris gets in the way. Applying the tape slowly and evenly helps avoid air bubbles and wrinkles.
| Common Mistake | Potential Consequence | Prevention Strategy |
|---|---|---|
| Uneven Grip Tape Application | Reduced Board Control | Use slow, methodical application with steady pressure |
| Rough Deck Surface | Poor Tape Adhesion | Clean and smooth deck before installation |
| Incorrect Cutting | Damaged Deck Edges | Use sharp utility knife with controlled movements |
Understanding these common grip tape installation challenges helps riders get a top-notch result. This improves their skating experience.
Best Practices for Grip Tape Maintenance

Keeping your skateboard in good shape is key for a smooth ride. Taking care of your grip tape helps your skateboard last longer and skate better. Regular upkeep stops wear and keeps the grip you need for skateboarding.
Here are some tips for keeping your skateboard’s grip tape in top shape:
- Clean your grip tape after each skate with a special cleaner
- Don’t let your grip tape get too wet or too sunny
- Use a grip tape eraser to clean off dirt and keep the grip
- Check your grip tape often for wear or damage
When you clean, be gentle to keep the grip tape in good shape. Avoid harsh chemicals or rough tools that could harm it. A soft brush or a special tool is best for dust and dirt.
You’ll need to replace your grip tape when it wears out, loses grip, or gets damaged. Most grip tapes last 3-6 months, depending on how often you skate.
Pro tip: Always store your skateboard in a cool, dry place to make your grip tape last longer.
Here’s when to replace your grip tape:
- Light skaters: Replace every 6-8 months
- Frequent skaters: Replace every 3-4 months
- Professional or competitive skaters: Replace every month
By sticking to these maintenance tips, your skateboard will stay in great shape. This means better grip and performance for an amazing skateboarding experience.
Choosing the Right Grip Tape Brand
Finding the perfect skateboard grip tape is key for top performance and keeping your board in shape. Each brand has its own special features that can change how you ride.
When picking grip tape, skaters should think about a few important things. Quality, how long it lasts, and the price are all big factors.
Top Manufacturer Comparisons
There are a few top brands to look at:
- Jessup Grip Tape: Known for exceptional grip quality
- MOB Grip: Renowned for durability and consistent performance
- Black Magic Grip Tape: Popular among professional skaters
- Shake Junt Grip Tape: Offers unique design options
Price vs. Quality Considerations
High-quality grip tape doesn’t have to cost a lot. Smart skaters find a balance between quality and price.
“The right grip tape can make or break your skateboarding experience.” – Professional Skate Instructor
Prices vary from $5-$15 for budget options to up to $25 for premium brands. Consider these when choosing:
- Grip texture quality
- Durability
- Adhesive strength
- Design aesthetics
Choosing the right grip tape for your style and budget is key. It ensures the best performance and maintenance for your skateboard.
Advanced Customization Techniques
Skateboard grip tape customization is more than just applying it. It turns your board into a personal statement. Skaters are finding creative ways to make their grip tape unique while keeping it functional.
Professional grip tape customization uses many innovative techniques:
- Multi-layer pattern design
- Precision skateboard grip tape cutting methods
- Integrating photorealistic graphics
- Experimental texture combinations
When cutting skateboard grip tape, precision is essential. Digital cutting machines help create detailed designs with perfect accuracy. Laser-guided cutting tools let skaters turn regular grip tape into unique artwork that shows their style.
Choosing colors and textures wisely is key in advanced grip tape customization. Some skaters mix different grip tape materials for a unique look and feel. By trying out different textures and colors, you can make a grip tape that looks cool and helps you control your board better.
Pro tip: Always prioritize grip performance while exploring creative customization techniques.
Advanced grip tape customization is about mixing art with function. Whether you make geometric patterns or add complex graphics, your grip tape can be a canvas for your creativity.
Conclusion
Learning to install skateboard grip tape is not just a skill—it’s an art. It affects how well you skate and keeps you safe. We’ve shown you how to apply grip tape perfectly, making your skateboard the best it can be.
Starting with the right grip tape is key to skateboard care. Every step, from getting ready to applying, is important. Skaters who learn these steps will ride better, stay safe, and have more fun.
Every skateboard is different, and practice is essential. Your first try might not be perfect. But with time and focus, you’ll get better at making your board feel just right for you.
Keep trying new things as you skate more. Your grip tape is a special link between you and your board. It can take your skating to exciting new levels.
FAQ
How often should I replace my skateboard grip tape?
How often you need to replace your grip tape depends on how much you skate. If you skate a lot, you might need to replace it every 3-6 months. This is when you see wear, less grip, or damage. If you skate less, you could get 6-12 months out of it before needing a new one.
Can I apply grip tape by myself, or should I get professional help?
Most people can put on grip tape by themselves with the right tools and a bit of patience. Our guide shows you how to do it yourself. It might take some practice to get it perfect, but with the right steps, you can do it at home.
What tools do I need for grip tape installation?
You’ll need a razor blade or utility knife, a file for smoothing, and a screwdriver for removing hardware. You might also use a roller or credit card to smooth the tape. A clean, well-lit workspace helps a lot.
How do I prevent air bubbles when applying grip tape?
To avoid air bubbles, apply the tape slowly from one end to the other. Use steady pressure. A credit card or roller can help smooth out the tape and air bubbles. For tough bubbles, use a pin carefully and then smooth the area.
Is clear grip tape as effective as traditional black grip tape?
Clear grip tape has the same grip as black tape but lets you see your deck’s design. It’s up to you whether you prefer clear or black. Some brands make clear tape that’s both grippy and durable.
How can I clean my grip tape to extend its lifespan?
Use a grip tape cleaner or a rubber block to remove dirt. Don’t use water or liquid cleaners, as they can harm the adhesive. Gently brush or rub the tape to clean it. Store your board in a cool, dry place to prevent wear.
Can I customize my grip tape design?
Yes! You can make your own designs with stencils, cutting, or layering colors. Some skaters use special tools for detailed patterns or logos. Just make sure your design doesn’t hurt the tape’s grip.
What’s the best way to cut grip tape around truck holes and deck edges?
Use a sharp blade or knife and work carefully. Apply the tape first, then cut around holes and edges. Use a file or sandpaper to smooth out any rough spots for a clean look.
How do I know when it’s time to replace my grip tape?
Look for signs like the tape getting smooth, wear spots, peeling edges, or less grip. If you slip more or the tape looks worn, it’s time for a new one. This keeps you safe and performing well.
Are there different grip tape textures available?
Yes, there are many textures and grit levels. Some are rough for more grip, while others are smoother. Brands like Jessup, MOB, and Grizzly offer different textures for different skating styles and tastes.