Learn How to Ollie on a Skateboard: Step-by-Step Guide
Skateboarding is an exciting sport that needs skill, practice, and determination. Learning to ollie on a skateboard is key for riders wanting to get better. This trick is the base for most aerial moves and street skating skills.
Getting good at ollie tricks can change how you ride. It moves you from basic moves to cool aerial tricks. Whether you’re new or getting better, knowing how to ollie opens up new possibilities.
Our guide makes learning ollie easy, breaking it down into simple steps. We cover stance, technique, and practice tips. These will help you get more confident and skilled.
Key Takeaways
- Understand the fundamental mechanics of an ollie
- Learn proper foot positioning and weight distribution
- Develop muscle memory through consistent practice
- Master both stationary and rolling ollie techniques
- Build confidence through progressive skill development
Understanding the Basics of Skateboarding Stance
Learning to ollie starts with knowing your skateboarding stance. Every skater needs a strong base before trying tricks. Your stance affects your balance, control, and how well you do on the board.
Regular vs Goofy Foot Position
Skaters have two main stance choices:
- Regular Stance: Left foot forward, right foot at the back
- Goofy Stance: Right foot forward, left foot at the back
Finding your natural stance is key to mastering the ollie. Most skaters figure out their preference by trying different stances.
Finding Your Comfortable Stance
To find your most comfortable stance, try these steps:
- Stand with feet together and have someone gently push you from behind
- The foot you naturally step forward with to catch your balance is likely your lead foot
- Practice both stances to see which feels more natural
Proper Foot Placement for Balance
Right foot placement is key for a good ollie. Your front foot should be just behind the board’s front bolts, with toes slightly angled. The back foot sits on the tail, ready to pop the board up for the ollie.
Essential Safety Equipment for Learning to Ollie

Learning to ollie in skateboarding is more than just mastering a trick. It’s about protecting yourself from injuries. Safety gear is not just extra; it’s your first line of defense.
Knowing what safety gear you need is key. Wearing the right gear can cut head injury risks by up to 85%. This makes quality protective equipment a must-have for every skateboarder.
- Helmet: Your most critical piece, protecting your head
- Knee pads: Key for avoiding scrapes and injuries when you fall
- Elbow pads: Help protect your joints during unexpected falls
- Wrist guards: Keep your wrists safe from fractures when trying new tricks
Think about where you practice your tricks. About 70% of skaters prefer private spots over public skate parks. This is because private areas let you focus without feeling pressured.
Whether you’re in a driveway or garage, a non-slip surface can lower injury risks by up to 40%.
Wearing safety gear shows you’re serious about skateboarding. It lets you learn and grow with confidence, just like experienced skaters do.
The Physics Behind a Perfect Ollie
Learning the science of skateboarding tricks can really boost your ollie skills. An ollie is not just a simple jump. It’s a mix of force, motion, and body mechanics that needs exact coordination.
Skateboarding uses complex physical rules to turn a simple move into a cool trick. When you learn ollie step by step, you need to get three key things right:
- Pop Force: The explosive downward pressure from the back foot
- Weight Distribution: The right body position and balance
- Movement Trajectory: The planned path of the board and body
Understanding Pop Force
Pop force is the quick, sharp push down that makes the skateboard jump. Skaters make this force by pressing down hard on the tail of the board. This quick energy push sends the board flying up.
Weight Distribution Mechanics
Good ollies need smart weight shifting. Skaters move their body weight in a way that lets the board lift off smoothly. This is done by shifting from a balanced stance to a dynamic lift.
Movement Trajectory Analysis
The path of an ollie is a mix of the skater’s movement and the board’s physics. By knowing how force, angle, and timing work together, skaters can get better and higher ollies.
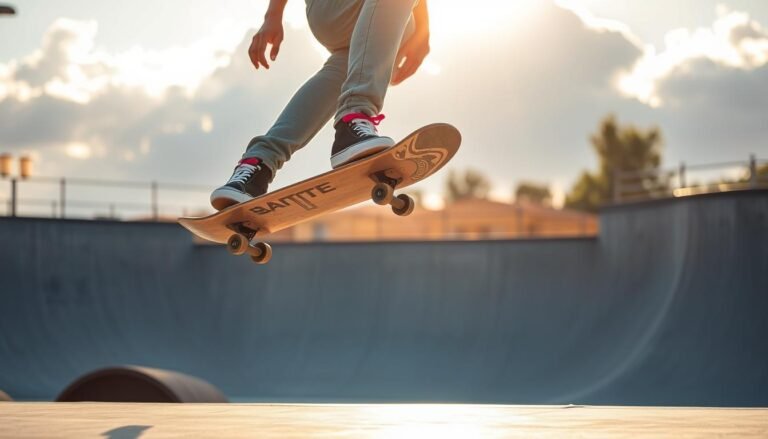
How to Ollie on a Skateboard
Learning to ollie on a skateboard is key for any skateboarder. It’s the base for many aerial tricks. You need to practice and understand the mechanics well.

The ollie is about moving your body in a certain way. This turns a static board into one that flies. Here’s what you need to do:
- Put your front foot just behind the bolts.
- Put your back foot on the tail.
- Crouch a bit to get ready for the jump.
- Push down on the tail with your back foot fast.
- At the same time, slide your front foot up to balance the board.
Learning to ollie takes time and effort. Start by practicing while standing in one place. Skate parks are great for learning, with their smooth floors helping you get it right.
For mastering the ollie, remember a few things:
- Keep your weight evenly distributed.
- Practice a lot to build muscle memory.
- Wear protective gear to feel more secure.
- Focus on getting the technique right before worrying about height.
Pro skateboarders say to spend a lot of time on basic moves. Break down the ollie into simple steps. Practice often to build a strong base for more tricks.
Mastering the Back Foot Pop Technique
The back foot pop is key for a good skateboard ollie. Skaters need to know how the back foot helps lift and move the board. This is important for a smooth jump.

To get a strong back foot pop, pay attention to a few important things. These details turn a simple move into a cool skateboard trick.
Ankle Position and Movement
Getting your ankle right is essential for a good ollie. Skaters should:
- Place the back foot close to the skateboard’s tail
- Keep the ankle a bit tense and ready to pop
- Stay relaxed but in control
Timing Your Pop
Getting the timing right makes a big difference. Tips for better ollies focus on foot movement:
- Wait for the right moment to shift your weight
- Use a quick, strong motion to snap the tail
- Match the back foot pop with the front foot slide
Common Pop Mistakes to Avoid
Knowing common mistakes helps improve your ollie. Here are some common errors:
| Mistake | Correction Strategy |
|---|---|
| Weak tail snap | Work on quick ankle movements |
| Inconsistent foot placement | Use markers to keep foot spots the same |
| Premature or delayed pop | Do drills to improve timing |
“The back foot is your power generator – master its movement, and your ollies will reach new heights.” – Professional Skateboarder
Keep practicing and focus on your technique. Soon, your back foot pop will become natural. This will take your skateboarding to the next level.
Front Foot Sliding Motion Explained

Mastering the ollie needs precise front foot movement. The sliding motion is key to turning a basic pop into a cool trick. Learning this technique can really help you get better at ollies step by step.
The front foot is vital for getting vertical momentum. Skateboarders should aim to slide the foot upward parallel to the board. This mix of tail pop energy and smooth upward motion is essential.
- Position the front foot 1-2 inches behind the front bolts
- Keep the foot parallel to the board during the slide
- Maintain consistent pressure throughout the motion
Timing is key for the front foot slide. Bad foot direction can lead to turns or misalignment in the air. Skaters need to practice keeping a straight path by controlling the slide’s angle and pressure.
“The front foot slide is the magic that turns a simple pop into an impressive ollie” – Professional Skateboarding Instructor
Sliding the front foot creates vertical upward momentum. By mixing the arc-shaped energy from the pop with the slide’s force, skaters can jump higher and control their ollies better.
Combining Pop and Slide for Height
Mastering the ollie needs you to blend pop and slide smoothly. It’s a key part of skateboarding. Learning to mix these actions will boost your ollie skills.

To jump higher, you must time and move well. It’s about switching from popping the tail to sliding the front foot smoothly. This needs muscle memory.
Coordination Tips for Maximum Ollie Height
- Keep your body centered directly over the skateboard
- Maintain a consistent knee bend throughout the motion
- Practice uniform weight distribution
- Focus on explosive but controlled back foot pop
Height Control Techniques
Mastering ollie height is about small body movements. Skaters say to practice drills that focus on:
- Gradual ankle extension during the pop
- Smooth front foot slide trajectory
- Consistent upper body positioning
“The perfect ollie is a dance between power and precision.” – Professional Skateboarder
Remember, height comes from practice, not just strength. Every try builds muscle memory and sharpens your skills.
| Technique | Focus Area | Skill Level |
|---|---|---|
| Basic Pop | Tail Contact | Beginner |
| Slide Timing | Front Foot Movement | Intermediate |
| Height Control | Full Body Coordination | Advanced |
Practicing Static Ollies First

Learning ollie drills starts with static moves. Static ollies are key for mastering tricks before moving to more complex ones. Beginners should work on their skills while standing to build confidence and muscle memory.
Key elements of static ollie practice include:
- Choosing a flat, smooth surface
- Wearing protective safety gear
- Maintaining a consistent stance
- Practicing precise foot placement
Building muscle memory needs lots of practice. Start by placing your skateboard on a carpeted floor or grass to prevent it from rolling. This lets skaters focus on their body movements without worrying about the board.
Effective static ollie practice drills involve:
- Practicing pop technique without moving
- Focusing on foot positioning
- Understanding weight distribution
- Developing consistent motion
About 75% of skaters prefer practicing at home. Static ollies are a great starting point for learning. By spending time on stationary techniques, skateboarders can greatly improve their ollie skills before tackling more advanced tricks.
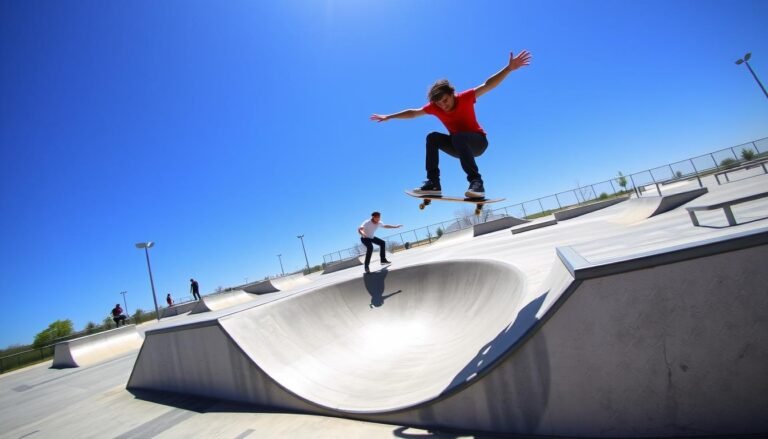
Moving from Stationary to Rolling Ollies
Learning to do ollies while moving is a big step in skateboarding. It takes confidence and skill to do smooth ollies on the go. The way to get better is to practice little by little and in a smart way.

Learning to ollie on a skateboard while moving is tough. It’s hard to keep your balance and control your speed. These are the main challenges for beginners.
Speed Management Strategies
When you’re doing rolling ollies, controlling your speed is key. Here are some tips to start with:
- Start on flat, smooth surfaces with little slope
- Keep a steady, comfortable speed
- Stay relaxed and balanced over the board
- Get used to slower speeds before trying faster ones
Balance Adjustments While Moving
Getting your balance right for rolling ollies is all about how you position your body. Here are the main things to focus on:
- Keep your knees bent to absorb shocks
- Keep your center of gravity low
- Practice shifting your weight while moving
- Start with small, controlled ollies
Getting good at rolling ollies takes time and lots of practice. Every try gets you closer to mastering this essential skateboarding skill.
Common Ollie Mistakes and Solutions

Learning to ollie can be tough for skateboarders. Skateboard ollie tips can help you get past common problems. Knowing these mistakes can speed up your learning.
- Uneven Board Lift: This happens when skaters don’t spread their weight right during the ollie
- Inconsistent pop technique messes up board height
- Wrong foot placement lowers ollie height and control
Ollie troubleshooting needs focused practice and knowing the basics. Many beginners have trouble with board control and keeping a steady height.
| Common Mistake | Solution |
|---|---|
| Weak Back Foot Pop | Practice explosive ankle movement |
| Unbalanced Weight Distribution | Center body weight over skateboard |
| Inconsistent Front Foot Slide | Practice smooth sliding motion |
“Mastering the ollie is about precision, not power” – Professional Skateboarder
Improving your ollie involves muscle memory, regular practice, and focusing on technique. Don’t rely on brute force.
- Start with stationary ollies
- Practice foot placement
- Watch tutorial videos
- Get feedback from experienced skaters
By fixing these common mistakes, skateboarders can greatly improve their ollie skills. This boosts confidence on the board.
Progressive Practice Drills for Better Ollies
Getting better at ollies takes a lot of practice and a smart plan. Skateboarders aiming to improve their ollies need a detailed approach. This approach should help build muscle memory and improve technique. The right plan can turn a good skater into a great one.

Practicing regularly is key to mastering ollies. Skaters should make a plan for their training. This plan should work on both physical skills and mental confidence.
Balance Training Exercises
Balance is the base of great ollie skills. Try these exercises to improve:
- Stand on one leg for 30 seconds on each leg
- Use a skateboard balance board
- Do yoga poses to strengthen your core
- Jump on a trampoline to get better at controlling your body
Muscle Memory Development Techniques
Building muscle memory means doing the same movements over and over. Skaters can improve their ollies with these drills:
- Do static ollies without moving
- Try 50 ollie attempts every day
- Record yourself to see how you’re doing
- Use your mind to practice between actual practice sessions
“Repetition is the mother of skill. The more you practice, the more natural your ollie becomes.” – Professional Skateboarder
With hard work, skaters can make their ollie skills amazing. Always remember, patience and regular practice are your best friends in improving your tricks.
Conclusion
Learning to ollie is more than a trick—it’s about growing your skills, patience, and confidence. By following this guide, you’ve started your journey in skateboarding.
Every pro skater began where you are now. Success comes from practicing regularly and staying motivated. With each try, your ollie will get better, helping you master more tricks.
Skateboarding is a never-ending journey. As you get better at the ollie, you’ll unlock many other tricks. Stay committed, wear safety gear, and enjoy the ride. Your skateboarding journey is just starting!
FAQ
How long does it take to learn how to ollie?
Learning to ollie takes a few weeks to a few months. It depends on how often you practice. Most people can land basic ollies in 2-3 months with regular effort.
Be patient and break the technique into smaller steps. This makes it easier to learn.
Do I need special shoes for learning to ollie?
You don’t need special shoes, but skate shoes are best. Look for flat soles, good grip, and ankle support. Brands like Vans, Nike SB, and Etnies are good choices.
The right shoes help you feel connected to the board. They also give better control.
What’s the most common mistake when learning to ollie?
The biggest mistake is rushing the technique. Beginners often jump too high or too quickly. Start slow and focus on foot placement and timing.
Practice the motion slowly and deliberately. This helps you master the basics.
Can I learn to ollie if I’m not very athletic?
Yes, you can! Ollies are more about technique than being athletic. With practice, patience, and proper instruction, anyone can learn.
Start with the basics, use safety gear, and break down the movement. Your fitness will improve as you practice.
How high should my first ollies be?
Focus on technique, not height, when you’re starting. Your first ollies might only be a few inches high. That’s okay.
As you get more comfortable, your ollie height will increase. Start low and gradually work on getting higher.
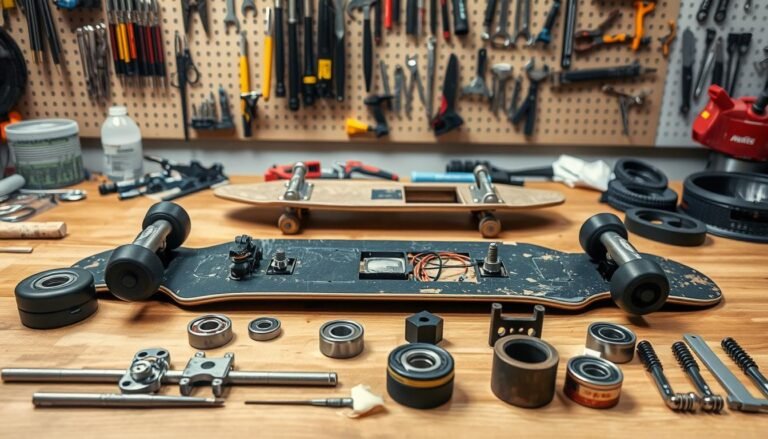
Do I need a special skateboard to learn ollies?
You don’t need an expensive board, but a good one helps. Look for a standard-sized deck, good trucks, and quality wheels. A comfortable and stable board is best for beginners.
Avoid cheap boards from department stores. They can make learning harder.
Is it better to learn ollies on grass or concrete?
Start on a smooth, flat surface like concrete or a skateboard park. Grass can cushion falls but makes it hard to feel the board’s movement. Use safety gear and practice on a smooth surface.
This allows you to roll smoothly and practice your technique consistently.
How often should I practice ollies?
Practice 3-4 times a week for 30-45 minutes each session. Short, focused practice is better than long, sporadic sessions. Take breaks, stay hydrated, and listen to your body to avoid injuries.
What safety gear is essential for learning ollies?
You need a helmet, wrist guards, knee pads, and elbow pads. These protect you from injuries during falls. Invest in quality gear that fits well and provides proper protection.
Wearing safety gear is smart, not uncool!
Can adults learn to ollie, or is it just for kids?
Skateboarding and learning ollies are for everyone, no matter your age! Adults can learn too. While younger skaters might learn faster, adults have advantages like better body awareness and patience.
It’s never too late to start skateboarding and learn new skills.