For this box you will need a bunch of two by four's, a sheet of ply wood metal coping (make sure its pretty hard. Soft Coping dents when you land on grinds). You can get the coping at any hardware store. It's not really coping but it works. Then you can't forget the most important part… The screw driver and some screws!
 1. First you have to build the Frame. Right Now you only need one frame but In total you will need to make 3 of these. Measure out your 2 by 4's like the ones here and then screw them together.
  2. Cut a sheet of ply wood to fit right on top of your frame. Then put only a few nails on since you will be using lot's of screws for the coping.
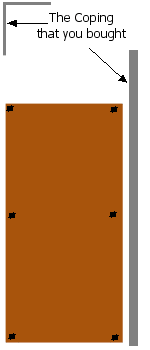
  3. Take the Coping that you bought and then put it on the box. Draw lines on the coping to find out where to cut it. Then cut it with metal cutting scissors (or with whatever you can).
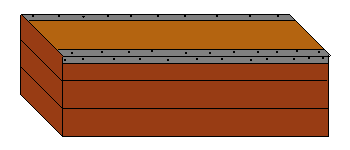
  4. Once the metal is cut take a screw gun and some screws. The screws should be able to go through the metal without much trouble but you can hammer some holes with a nail then screw if you need to. It is very important to do the nails like on the left. how between every gap is a nail. Like a brick wall the are not all lined up. 6 inches is a good distance to space your nails. If you have it too far or don't have a pattern like a brick wall the metal can bubble up and it really messes you up on your tricks. Do this to both sides then go to step 5.
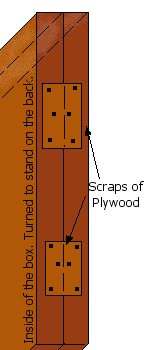
  5. Build another frame exactly the same as the last. Then put the frame right on top of the first on, then take some scraps of ply wood. Make sure you leave a gap right in the middle. If you don't then you cant adjust your box. Only put the ply wood on the long sides of the box. Not the short bottom and top because you need that space to adjust your box's height.
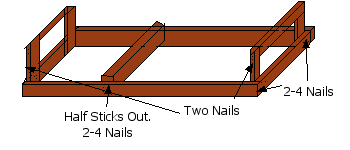
  6. Then create your third and final frame. This one needs more work. Take Some extra two by four's and build something like this. Make sure the parts that stick out on the short ends only stick out 6.5 – 7.5 inches.
  7. Once you finish step 6 place the step 6 frame where you want the box. Then put the box on top of that frame. If you want your box lower, lift up the box (not including the extra frame (step 6)) Then place it were you want. Anyway you want the box higher add the extra frame. It is quite hard to life the box around without any handles. But I left that to you… Have fun!


